▶ Dirt Digger 9T exploration Drill Guide
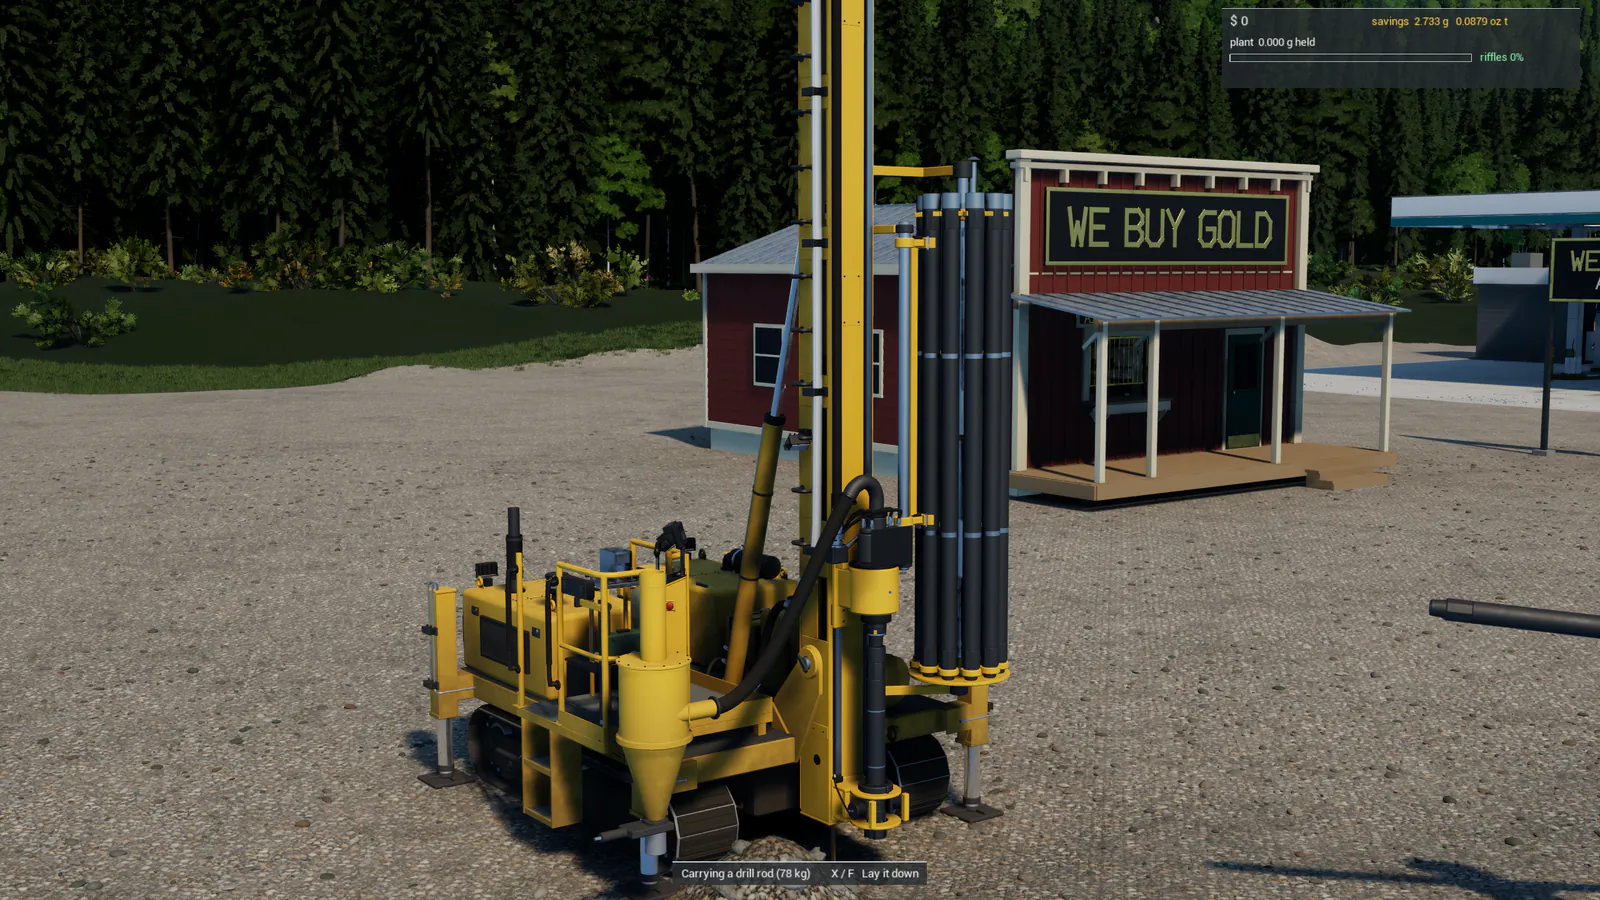
You'll need: The 9 t tracked exploration drill (free to try from the SPAWN MENU in the pause menu). Fairly level ground at the spot you want to test, out of deep water.
The exploration drill tells you what's under the ground before you move any of it. It drills a narrow hole straight down, through the topsoil, the muck, the sand and the gravel, to bedrock. Every 1.5 m the cuttings go into a numbered sample bag, and the rig's sample station washes and pans each one. Then the hole's log shows each layer the bit went through, how deep bedrock is, and how much gold was in every metre.
Drill before you dig. Stripping overburden and running a wash plant costs hours of fuel and machine time. A few test holes tell you where the pay is, how deep it lies and how thick it is, so the excavator goes straight to the good ground.
Step 1: Drive the rig to the spot
Walk up to the drill and press Y (Enter) to climb in. It drives on its tracks like the excavator's undercarriage: LT and RT (Q / E) drive the left and right tracks forward, LB and RB (Z / C) drive them back. Travel with the jacks up and the mast down.
Pick fairly level ground. The jacks can take out a gentle slope, about 5 degrees, but not more. They also won't set down in water more than about half a metre deep, so stay out of the creek itself.
Step 2: Set it up on its jacks and level it
Stop, then push the left stick right (D) and hold it. All four jacks go down to the ground first. Once every pad is down, the low corners lift until the deck is level. Keep holding until the rig stops moving. It's then held level on its jacks, and the hint bar's Drill line shows how level the deck is.
On lumpy ground, like fresh dozer spoil, it takes a few seconds longer while the pads press into the loose dirt. That's normal. Let it finish rather than letting go part way.
If the ground is too steep, it says Too steep here for the jacks to level it. Wind the jacks up (left stick left, A) and move to flatter ground, or push a flat pad with the dozer first.
Step 3: Raise the mast
Pull the right stick back (I) to raise the mast until it stands straight up. The mast only goes up once the rig is held level on its jacks. If it isn't, you get Level it on its jacks first with the deck's tilt.
Step 4: Start the rotation
Push the right stick right (L) to turn the bit. Push it all the way across and hold it there for a moment, just under a second. The rotation then stays on by itself and you can let go of the stick. It says Rotation held at ... rpm.
The hint bar's Rotation line always says what the bit is doing:
| It says | What it means |
|---|---|
| STOPPED | Not turning. Push the stick across to start it. |
| STARTING | Spinning up. On the bottom it may ease the weight off the bit for a moment to get it turning. |
| TURNING ... rpm | Drilling speed. |
| HELD, TURNING ... rpm | The rotation is held on with the stick let go. |
Push the stick further across while it's held to turn faster. To stop it, push the stick the other way (right stick left, J). Pulling a rod, moving the mast or getting out also stops it.
Step 5: Feed down and collar the hole
With the bit turning, push the left stick forward (W) to feed the head down. When the bit touches the ground the hole is collared and gets its number: DH-001, DH-002 and so on.
Hold the feed down and the bit cuts its way in. The hint bar shows the bit's depth, what it's in right now (topsoil, muck, sand, gravel, clay, a boulder, bedrock) and how fast it's going. Gravel and boulders drill slower than sand and topsoil.
You don't need to stop for samples. Every 1.5 m is bagged by itself as the bit passes it (bag 1 to the sample station, bag 2 and so on). B (B) bags what's come up so far if you want it early, but you never have to press it.
Press the right stick click (F) to switch between the outside view, the operator's view at the console and a close view of the collar.
Step 6: Add rods as you go down
The bit goes down as far as the head can travel down the mast. To go deeper, add a rod. Press A (R) any time while you're drilling: it says Next rod ready and the rod goes on by itself when the head reaches the bottom of the mast. The rotation stops, the handler swings a rod from the carousel over the hole and threads it on, and the clamp lets go. Then start the rotation and feed down again.
The carousel holds 11 rods, 3 m each, enough to reach about 32 m. That's deeper than bedrock lies anywhere on Claim 1.
If adding a rod is refused, the message tells you why: the mast isn't fully up, or the carousel is empty. If a rod's handling ever stops part way, press A or X again and it carries on from where it stopped.
Step 7: Read the depth and the layers
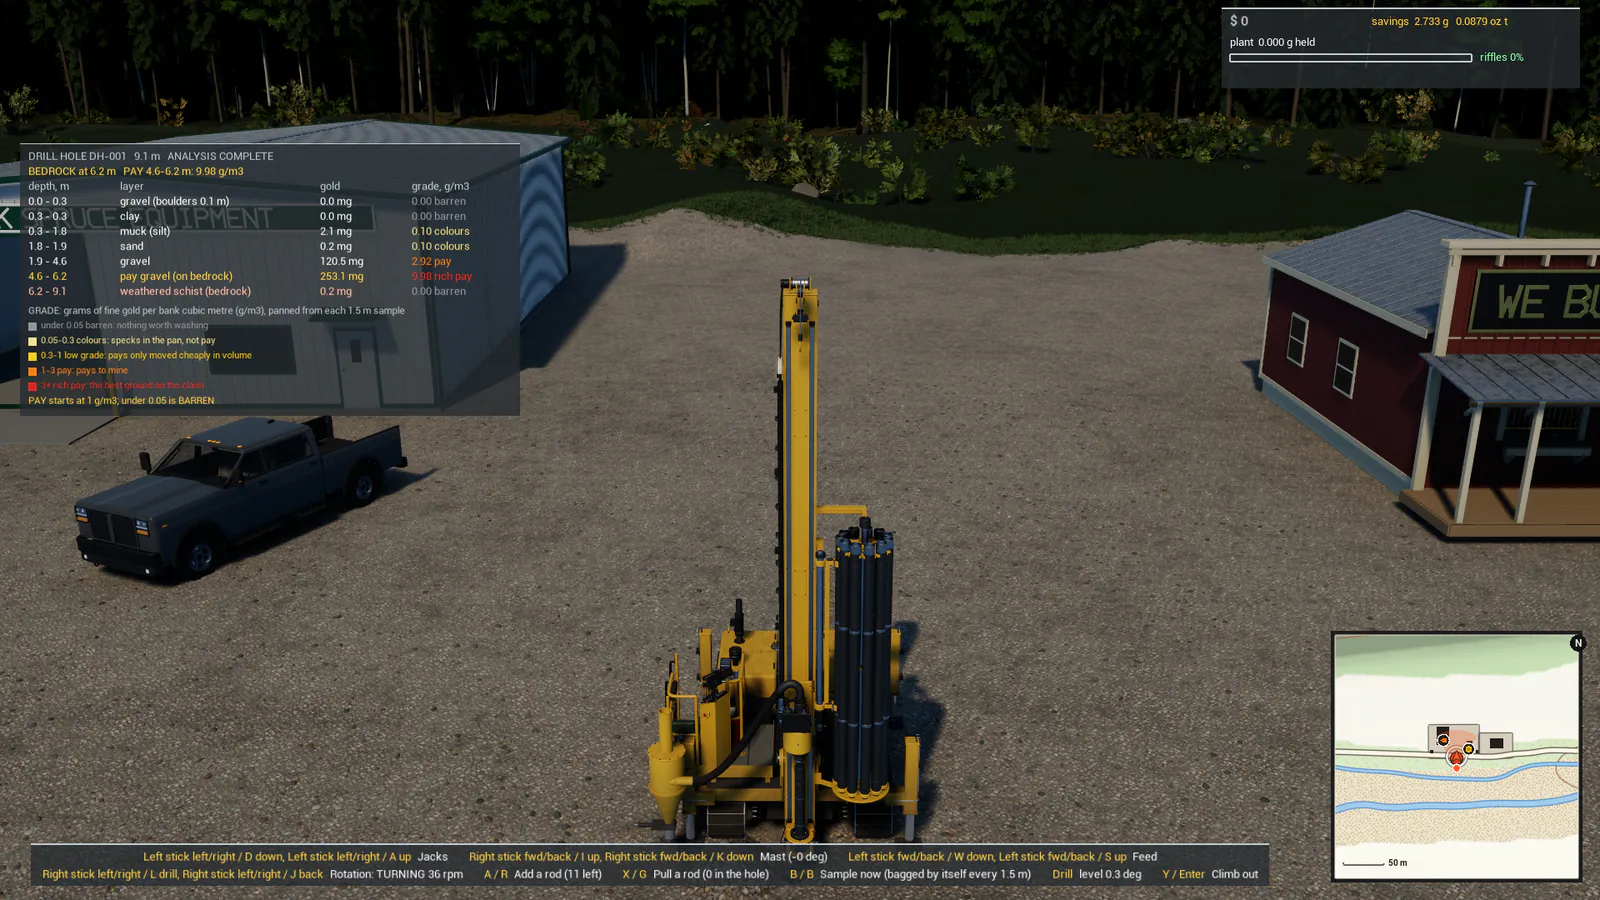
While you're in the drill, the log panel on the left of the screen shows the hole as it goes down:
- The top line: the hole's number, its depth and DRILLING.
- The finding: BEDROCK at ... m once the bit reaches it, and the PAY layer with its grade.
- One row per layer the bit passed through: its depth from and to, what it is, the gold panned from it in milligrams and its grade.
- A key underneath that explains the colours.
Each bag takes a moment at the sample station, so a layer reads panning... until its bags have been washed. Gold-bearing layers are called by name: gold-bearing gravel, and pay gravel (on bedrock) in amber.
Step 8: Reach bedrock
Keep drilling until the panel shows BEDROCK at ... m. Bedrock is the top of the weathered schist, and the best gold usually lies on it and in the gravel just above it. Drill on a metre or so into the bedrock so the whole pay layer above it is in the log.
Bedrock and boulders drill slowly. That's expected: the rig can only press the bit down as hard as its own weight holds it on its jacks, so on hard ground the feed stalls and the bit cuts at its own pace instead of lifting the machine. If the bit reaches solid rock it says Refusal: the bit is on sound rock and won't go any deeper. The hole is as deep as it goes.
Step 9: Pull the rods back out
Press X (G) to pull a rod. You can press it wherever the head is on the mast: the rotation stops and the rig brings the next joint to the clamp, unthreads the rod and racks it in the carousel by itself. Press X again while one is coming out and the next one follows it. The hint shows how many rods are still in the hole and how many more are queued.
When the last rod is out it says Only the hammer is on the spindle: feed it up out of the hole. Pull the left stick back (S) to feed the head up. Once the bit is out of the ground the hole is finished at ... m, and the panel reads ANALYSIS COMPLETE once the last bags are panned.
Step 10: Stow it and move to the next hole
Lower the mast with the right stick forward (K). It won't come down while the string is still in the hole or a rod is part way through its handling. Then wind the jacks up with the left stick left (A) and drive to the next spot.
The washed cuttings are left in a small cone beside the hole, a marker lath stands beside the collar, and the hole goes on the map. A full test hole, from driving up to stowing, takes about 3 to 5 minutes.
Reading the results
The log panel
The log panel shows the hole you're drilling, or the nearest hole within about 12 m of the rig. Every layer's grade is in grams of fine gold per bank cubic metre (g/m³), the gold in a cubic metre of ground as it lies, and is coloured by what it means:
| Colour | Grade (g/m³) | What it means |
|---|---|---|
| Grey | under 0.05 | Barren: nothing worth washing |
| Pale yellow | 0.05 to 0.3 | Colours: specks in the pan, not pay |
| Yellow | 0.3 to 1 | Low grade: pays only if moved cheaply in volume |
| Orange | 1 to 3 | Pay: pays to mine |
| Red | 3 and over | Rich pay: the best ground on the claim |
Pay starts at 1 g/m³. What you want to see is an orange or red layer, a metre or more thick, not too deep under the surface.
The map
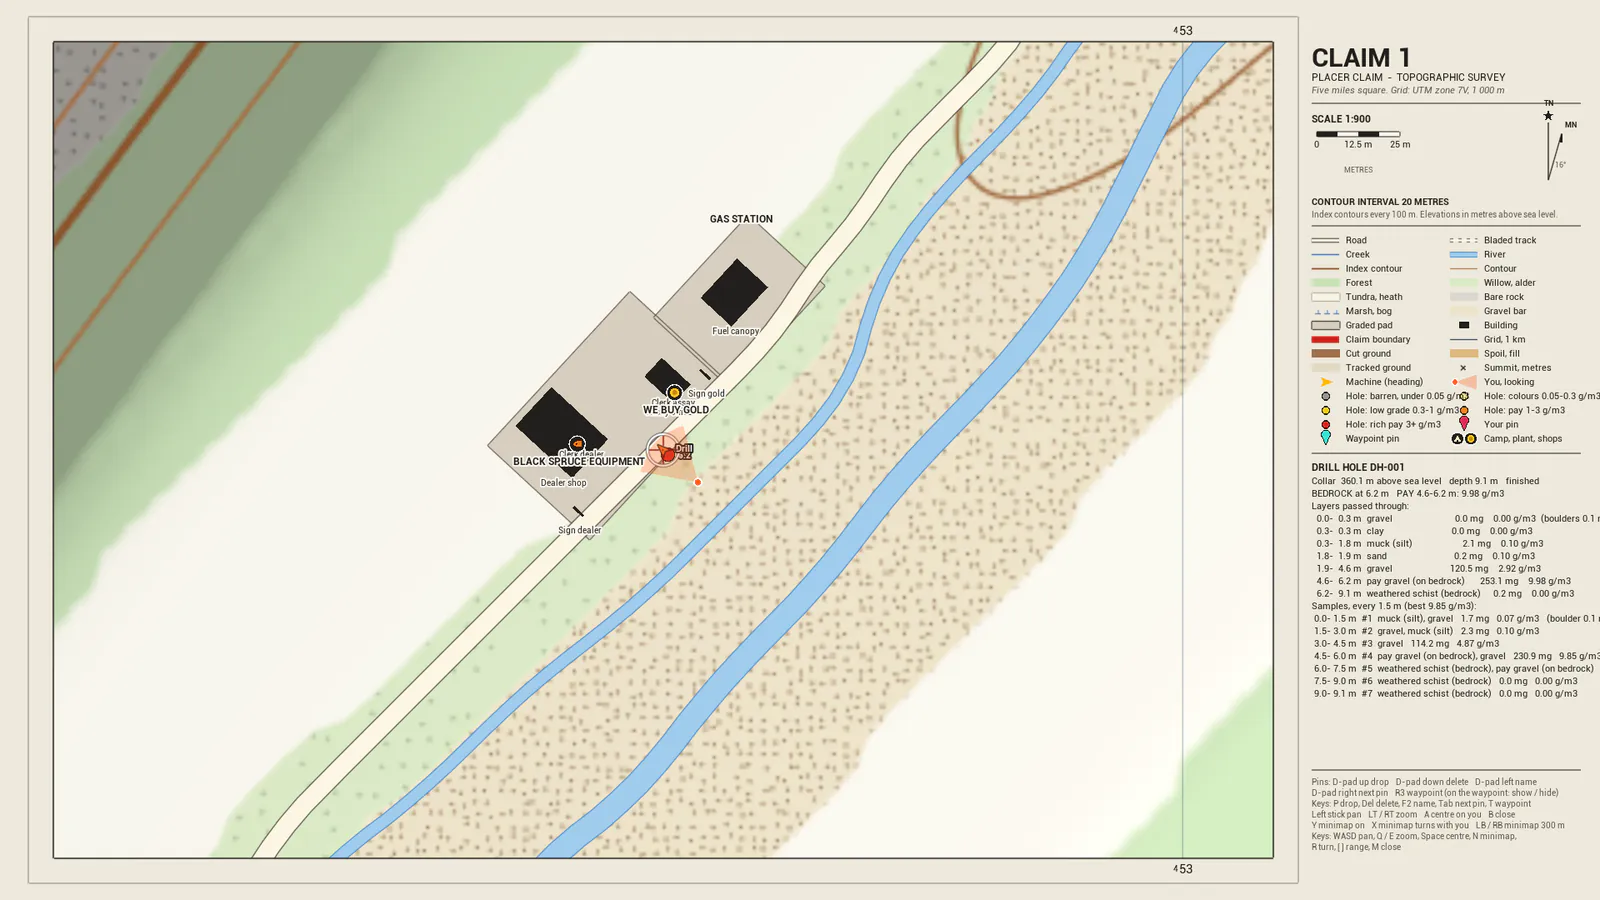
Open the map (View tapped, or M). Every hole is a dot in the same colours, from its richest layer, and the richer the hole, the bigger its dot. A hole still being drilled has a white ring. One that's been dug out is faded.
Zoomed in close, each hole has a number beside it: the depth to bedrock in metres. R means it stopped on solid rock, and > with a number means it didn't reach bedrock. Move the map's crosshair onto a hole (left stick, or W A S D) and its full log appears on the right: the collar height, the depth, bedrock, every layer and every 1.5 m sample with its gold. Zoom with LT / RT (Q / E, or the mouse wheel).
Using several holes to choose where to dig
One hole only tells you about the narrow column of ground it went through. A hole a couple of metres off the paystreak can read barren. So drill a few:
- Drill a line across the valley or the creek flat, a few metres to a few tens of metres apart. The orange and red dots show where the paystreak runs, and the grey ones on either side show its edges.
- Compare the depths. Where bedrock is shallow, the pay is close to the surface and cheap to reach. Where the pay is deep, you'll strip more overburden for it.
- Fill in between the best holes to follow the streak, then put your pit, and your wash plant, there.
- The sample gold is yours. The gold panned at the sample station goes into your savings.
Troubleshooting
The bit won't spin
- Read the Rotation line in the hint bar. STOPPED means the rotation isn't on: push the right stick right (L) all the way across and hold it for about a second until it says Rotation held.
- Pushing the stick only part way, or a little up or down, won't hold it on. Push it straight across.
- STARTING on the bottom is normal for a moment: the rig eases the weight off the bit until it turns, then puts it back.
- Pulling a rod, moving the mast or getting out stops the rotation. Start it again afterwards.
The rods stall on hard ground
That's expected. The rig can only push the bit down as hard as its own weight holds it on the jacks, so it doesn't lift itself off the ground. On boulders and bedrock the feed stalls and the bit cuts slowly at its own pace. Keep the rotation on and the feed down and it gets through. Refusal: the bit is on sound rock means solid rock: the hole is done, so pull the rods.
The rig isn't level, or it hops about
- Hold the jacks lever until all four pads are down and the rig stops moving. On loose spoil it takes a few seconds longer.
- Too steep here for the jacks to level it means more than about 5 degrees: move to flatter ground, or doze a flat pad first.
- Water too deep under a jack means you're in the creek: move out of it.
- The ground gave way under a jack means a pad sank into soft ground. Wind the jacks up, move a little and set up again on firmer ground.
- Always travel with the jacks fully up.
The head won't come up, or "only the hammer is on the spindle"
That means there's no rod left on the spindle to pull, so just feed the head up (left stick back, S). If a rod is still on the spindle or in the handler, press X (G): the rig picks the leftover rod up and racks it. If a rod's handling stopped part way, A or X carries it on from where it stopped. The mast won't move until every rod is racked or made up in the string.
The hole got lost after a reload
Holes and their logs are saved with your site, and they're all on the map: open it and move the crosshair onto the dot to read the log. The log panel in the drill only shows the hole you're drilling or the nearest one within about 12 m, so drive back to it. A drill saved with its rods in a hole comes back standing over that hole, held on its jacks, so you can carry on drilling or pull the rods.
If the drill itself got stuck or tipped over, use Pause > RECOVER.